Showing posts with label cheese. Show all posts

Wednesday, April 16, 2014

Cheese Night!

For April's cooking group, we decided to have a refresher course on cheese and how to make your own homemade ricotta cheese!  Last year (or maybe the year before??) we learned how to make ricotta using whole milk in your microwave (Recipe here) It is so easy to do and soooo delicious that I think it's safe to say that this recipe is life changing!! 


You simple cook your whole milk in the microwave until it reaches 185 degrees (F), then add in a little vinegar, stir--let cool strain and serve!


Here's our final product--pretty yummy huh?!? Here's we spread it on a fresh baguette and topped with fresh local honey and thyme sprigs but the possibilities are endless!

Here are some more recipes with Ricotta:

Ricotta Recipes

Ricotta is italian for "recooked", traditionally made by reheating the whey left over from making mozzarella.  Ricotta is a versatile cheese.  Try mixing a little ricotta into your scrambled eggs for added fluffiness or olded into an omelet for extra flavor.  Ricotta adds texture and moisture to pancakes and when mized with honey makes a refreshing topping for French toast or waffles.  Tired of prepared spaghetti sauce? Stir in a few spoonfuls of ricotta and transform the sauce into something new and different.  Spread on a toasted baguette and the topping choices are unlimited; peaches, plums or apricots at peak season, tomatoes, basil adn olive oil, caramelized onions, butternut squash, etc. Top toasts with store bought chutney, relish or tapenade for a quick appetizer.  ricotta also can be used as substitute for cream cheese and adds texture to any cheesecake recipe.

Honeyed Ricotta

Ingredients:
15 ounces part skim ricotta
2 T honey
1/4 t pure vanilla extract
1/4 t grated lemon zest

Preparation:
In a small bowl, use a whisk to whip all the ingredients together until light and creamy, 1 to 2 minutes.  Store in an airtight container in the refriderator for up to 5 days


Baked Ricotta

Ingredients:

2 cups ricotta cheese (full fat/whole milk)
2 large egg whites (lightly beaten)
1 T chopped fresh thyme (try dired oregano as well)
zest of 1 lemon
salt and pepper
2 T olive oil

Preheat oven to 350.  Mix the ricotta with the beaten egg whites and add most of the chopped thyme, the lemon zest and salt and pepper.

Brush an 8 inch springform or 2 smaller ramekins with oil, and pour in the ricotta mixture then drizzle with olive oil and scatter a little more chopped thyme over the top.  Place on a baking sheet and cook in the oven for about 30 minutes.  The baked ricotta will rise a little and set dry on top, but will not turna golden color like a cake.

Let the pan cool a little before springing open, and removing to a plate.  Leave to cool al ittle longer, then cut into wedges and eat while still warm.  Add a squeeze of lemon at the end before serving with the baked ricotta.  Can use 1/4 tsp dried herbs in place of fresh, try oregano or Herbs de Provence.

Sweet Variation: Omit the thyme, salt and pepper.  Add 3 T sugar and 1 T honey to mixture.  Once removed from oven, drizzle 2-3 T honey over ricotta cake.

For the rest of the evening, we enjoyed cheese tasting with good company and conversation.  If you're short on time but need to make an impressive display for guests, a cheese sampler is the way to go!  You could easily scour pinterest for ideas on how to display your cheeses, but there is no wrong way to do it.

Along with the cheese, you could add something sweet, something crunchy, something fruity and something salty.  On our cheese board, we added salami, apple slices, fresh honey drizzles, pecans, olives, fresh herbs and dried cherries and of course, we had bread and crackers to go with it.

And one more thing, don't forget to label the cheese some way so that people can see the flavors.  Enjoy!


Monday, September 30, 2013

Pie Night (aka Pizza Night) with guest chef Brian

Ultimate Pizza Sauce

We are giving the doubled version, we always make more and freeze what we don't use.

8 tbsp. olive oil
4 tbsp. butter
2 cups onions, chopped
1 cup celery, chopped
4 cloves garlic, minced
1 quart tomatoes 
1 8 oz. tomato sauce
8 tbsp. grated parmesan cheese
4 tsp. dried basil
4 tsp. dried oregano
2 tsp. salt
2 tsp. sugar
1 tsp. black pepper
4 bay leaves
5 tsp. fennel seeds

1. In a large skillet, melt butter with the oil. Add the onion, celery, and garlic and saute until soft and transparent.
2. Add tomatoes and tomato sauce and stir until smooth.
3. Add remaining ingredients and bring to slow simmer. (throw in the parmesan rind while it sautes)
4. Simmer for 30-60 minutes (or not at all depending on your taste and time frame.)
5. Remove bay leaves and spread sauce on prepared pizza dough.


PETER REINHART'S NAPOLETANA PIZZA DOUGH RECIPE

For both doughs We used 00 flour, found at Caputo's.  The recipe also says it makes (6) 12" pizzas, but I only got 4 out of it and I would actually do (3) 16" pizzas but i like bigger pizzas
4 1/2 cups (20.25 ounces) unbleached high-gluten, bread, or all-purpose flour, chilled
1 3/4 (.44 ounce) teaspoons salt
1 teaspoon (.11 ounce) instant yeast
1/4 cup (2 ounces) olive oil 
1 3/4 cups (14 ounces) water, ice cold (40°F)
Semolina flour OR cornmeal for dusting
1. Stir together the flour, salt, and instant yeast in a 4-quart bowl (or in the bowl of an electric mixer). With a large metal spoon, stir in the oil and the cold water until the flour is all absorbed (or mix on low speed with the paddle attachment), If you are mixing by hand, repeatedly dip one of your hands or the metal spoon into cold water and use it, much like a dough hook, to work the dough vigorously into a smooth mass while rotating the bowl in a circular motion with the other hand. Reverse the circular motion a few times to develop the gluten further. Do this for 5 to 7 minutes, or until the dough is smooth and the ingredients are evenly distributed. If you are using an electric mixer, switch to the dough hook and mix on medium speed for 5 to 7 minutes, or as long as it takes to create a smooth, sticky dough. The dough should clear the sides of the bowl but stick to the bottom of the bowl. If the dough is too wet and doesn't come off the sides of the bowl, sprinkle in some more flour just until it clears the sides. If it clears the bottom of the bowl, dribble in a tea- spoon or two of cold water. The finished dough will be springy, elastic, and sticky, not just tacky, and register 50 to 55F.
2. Sprinkle flour on the counter and transfer the dough to the counter. Prepare a sheet pan by lining it with baking parchment and misting the parchment with spray oil (or lightly oil the parchment). Using a metal dough scraper, cut the dough into 6 equal pieces (or larger if you are comfortable shaping large pizzas), You can dip the scraper into the water between cuts to keep the dough from sticking to it, Sprinkle flour over the dough. Make sure your hands are dry and then flour them. Lift each piece and gently round it into a ball. If the dough sticks to your hands, dip your hands into the flour again. Transfer the dough balls to the sheet pan, Mist the dough generously with spray oil and slip the pan into a food-grade plastic bag.
3. Put the pan into the refrigerator overnight to rest the dough, or keep for up to 3 days. (Note: If you want to save some of the dough for future baking, you can store the dough balls in a zippered freezer bag. Dip each dough ball into a bowl that has a few tablespoons of oil in it, rolling the dough in the oil, and then put each ball into a separate bag. You can place the bags into the freezer for up to 3 months. Transfer them to the refrigerator the day before you plan to make pizza.)
4. On the day you plan to make the pizza, remove the desired number of dough balls from the refrigerator 2 hours before making the pizza. Before letting the dough rest at room temperature for 2 hours, dust the counter with flour, and then mist the counter with spray oil. Place the dough balls on top of the floured counter and sprinkle them with flour; dust your hands with flour. Gently press the dough into flat disks about 1/2 inch thick and 5 inches in diameter. Sprinkle the dough with flour, mist it again with spray oil, and cover the dough loosely with plastic wrap or a food-grade plastic bag. Now let rest for 2 hours.
5. At least 45 minutes before making the pizza, place a baking stone either on the floor of the oven (for gas ovens), or on a rack in the lower third of the oven. Heat the oven as hot as possible, up to 800F (most home ovens will go only to 500 to 550F, but some will go higher). If you do not have a baking stone, you can use the back of a sheet pan, but do not preheat the pan.
6. Generously dust a peel or the back of a sheet pan with semolina flour or cornmeal. Make the pizzas one at a time. Dip your hands, including the backs of your hands and knuckles, in flour and lift I piece of dough by getting under it with a pastry scraper. Very gently lay the dough across your fists and carefully stretch it by bouncing the dough in a circular motion on your hands, carefully giving it a little stretch with each bounce. If it begins to stick to your hands, lay it down on the floured counter and reflour your hands, then continue shaping it. Once the dough has expanded outward, move to a full toss as shown on page 208. If you have trouble tossing the dough, or if the dough keeps springing back, let it rest for 5 to 20 minutes so the gluten can relax, and try again. You can also resort to using a rolling pin, though this isn't as effective as the toss method.
7. When the dough is stretched out to your satisfaction (about 9 to 12 inches in diameter for a 6-ounce piece of dough), lay it on the peel or pan, making sure there is enough semolina flour or cornmeal to allow it to slide. Lightly top it with sauce and then with your other top- pings, remembering that the best pizzas are topped with a less-is-more philosophy. The American "kitchen sink" approach is counterproductive, as it makes the crust more difficult to bake. A few, usually no more than 3 or 4 toppings, including sauce and cheese is sufficient.
8. Slide the topped pizza onto the stone (or bake directly on the sheet pan) and close the door. Wait 2 minutes, then take a peek. If it needs to be rotated 180 degrees for even baking, do so. The pizza should take about 5 to 8 minutes to bake. If the top gets done before the bottom, you will need to move the stone to a lower self before the next round. if the bottom crisps before the cheese caramelizes, then you will need to raise the stone for subsequent bakes.
9. Remove the pizza from the oven and transfer to a cutting board. Wait 3 to 5 minutes before slicing and serving, to allow the cheese to set slightly.
Makes six 6-ounce pizza crusts.
from The Bread Baker's Apprentice by Peter Reinhart (Ten Speed Press) - reprinted with permission

This is the dough i have used for the last couple years, its simple, its consistent and doesn't need to be refrigerated over night, again we used 00 flour, found at Caputo's. 

Thin Pizza Crust Makes (2) small pizzas or (1) 16"  
2 1/4 tsp active dry yeast
1/4 tsp. sugar
3/4 cup 110 degree water
1 3/4 cups all-purpose flour
1/2 tsp. salt

1. dissolve yeast and sugar in water; allow to rest for 8 minutes.
2. In a separate bowl, combine flour and salt.
3. Pour yeast mixture over flour mixture and mix well with a heavy spoon.
4. Turn dough onto a floured surface and knead for 2 minutes. 


Salsa Di Pomodoro Fresco (Naples-Style Pizza Sauce)

Neapolitan Pizzaioli use an uncooked tomato sauce based on whole peeled tomatoes straight from the can, which preserves the bright taste and color of the tomatoes.

2 28-oz. can whole peeled tomatoes (packed in puree)
2 tbsp. kosher salt

1. Remove each tomato from the can and reserve 3 cups of the puree. Cut the tomatoes in half and , using your fingers, remove and discard the seeds (don't rinse).
2. Place the tomatoes in a food processor and pulse until just crushed but not pureed. (Alternatively, crush the tomatoes by hand or pass them through a food mill.)
3. Transfer the tomato sauce to a bowl and stir in the reserved 3 cups of puree and salt.

I forgot step one in making the sauce! We just put the entire can in the processor, still turned out great!


Margherita Pizza
Pizza dough, Naples-Style Pizza Sauce, fresh Buffalo mozzarella, fresh basil. 

Use the mozzarella sparingly. We covered the entire pizza with a whole ball of mozzarella, we would suggest only using half a ball to get a more authentic Italiano pizza. 


Apple, Bacon, and Gouda Pizza

ingredients:

1 pound of pizza dough (homemade or bought fresh from the deli)
2 tablespoons olive oil, divided
1 small red onion, sliced
1 garlic clove, minced
6 slices thick-cut bacon, cut into squares
1 large Honeycrisp apple, thinly sliced
7 ounce round of gouda cheese, grated
1/4 cup freshly grated parmesan cheese
7-8 sage leaves, chiffonaded
1 tablespoon honey
salt and pepper
cornmeal

directions:

Preheat oven to 450ยบ F with pizza stone in the oven (preheat baking pan if you don't have a pizza stone). In a non-stick skillet, heat 1 tablespoon of the olive oil over medium high heat. Saute onions with a little salt a pepper for 4-5 minutes to allow them to soften and begin to golden. Add the garlic and cook for one additional minute. Remove from heat and set aside until ready to use.
Place bacon pieces on a paper towel lined plate in an even layer. Microwave on high for 4 1/2 - 5 1/2 minutes (until pretty crisp). While the bacon is crisping, Hand stretch (or roll if you prefer a thinner crust) the dough into and oblong shape. Sprinkle some cornmeal on the pizza stone (or preheated baking sheet), carefully place the dough on the hot stone and bake for 2-3 minutes just to get a good par-bake on it. Remove from oven using a pizza peel.
Mix 1 tablespoon honey with 1 tablespoon olive oil and brush over entire pizza crust. Layer on half of the gouda followed by half of the apples. Then add the remainder of the gouda and then apples. Last, top with parmesan, bacon, and sage. Bake for another 12-15 minutes (until cheese is nice and melted and the crust is golden and crisp).
Cut into slices (or squares) and serve hot. Prepare to have your mind BLOWN.

We cooked the bacon in the oven. Used half the amount of onion. The directions don't indicate when to add the onion and garlic. We put it on after the honey and olive oil.  YUM

Bacon, Potato, Rosemary, and Fontina Pizza
Ingredients
1 recipe fresh pizza dough, 
3 to 4 baby Yukon gold fingerling potatoes, finely sliced
1/2 small onion, finely sliced
6 slices applewood smoked bacon, finely chopped
2 tablespoons rosemary leaves
1/4 cup extra-virgin olive oil, plus extra to grease pan
Kosher salt and freshly ground black pepper
1 cup shredded fontina cheese
1 cup baby arugula, optional
1/2 lemon, juiced

In a large mixing bowl, combine the fingerling potatoes, onion, bacon, and rosemary leaves. Add 1/4 cup of olive oil and season with salt and pepper, to taste. Toss together to coat with olive oil.

Pour the potato mixture onto the pizza dough, then sprinkle with shredded fontina. Bake for 20 to 25 minutes until crispy and golden, about 20 to 25 minutes. Garnish with arugula and drizzle the lemon juice over the top. Serve immediately.

We forgot to eat this with the arugula and lemon juice on top! Again we cooked the bacon in the oven before chopping. We didn't love the Fontina at Caputos, Harmon's carries a good one. We put parmesan and smoked mozzarella cheese. 


Asiago Cheese Bread

Just pizza dough, olive oil, rosemary, and asiago cheese (could use any good cheese)


Pizza Bianca

Pizza dough, sea salt, rosemary, olive oil.  

Cured Meats


Dessert Pizza
Pear
Raspberries
Chocolate
Apple Sauce/chunks
Marshmallows


Friday, August 24, 2012

We Made Cheese!

{Beehive Cheese Company Promontory Cheese}

Helloooo!!!!  It has been a really...really....really long time since we have updated this blog!  It's been a year to be exact--but who says new resolutions have to start in January??  For the month of August we had our very first 'Cheese Class'.  We had a teacher, Doug, from the Beehive Cheese Factory (up in Weber Canyon) come down and teach us how to make cheese!  (...not to mention we had all you can eat cheese while we learned...it was pretty amazing)

We made mozzarella and ricotta cheese and my life will never be the same.  That may sound like an exaggeration...but just think of all the delicious food you can make with access to fresh cheese at your fingertips!! (ha ha!)


{SeaHive Cheese--my personal fav.}

{Barely Buzzed--hand rubbed with espresso and lavender...I ate so much of this that my "pure" system came home with a HUGE headache!!!}


Doug brought this book down--said it's one of his favorites for making cheese, but it looked a little complex to me...and I'm kind of lazy.  That being said...if anyone makes Gouda or Brie and needs someone to sample something, I am definitely not too lazy to drive over and take a bite!!


There were a few "special" ingredients that you need to make mozzarella...citric acid and rennet tablets...but a little goes a long way and it really didn't take that long!  I think he said that you could get them at Harmon's (???) But I know you can get them on Amazon too...


Or, of course, they sell kits--and everything is included :)


Okay!  Here is the start of the Mozzarella... it was cooked in this big pot on a stove top...it's all about temperature and 'gentle' stirring...read the recipe that will be at the bottom of this post if you want more specific instructions :)


Doug clipped an instant thermometer onto the side of the pot for quick reference...


And here he is cutting the curd...you want it to be diced, so... side to side, front to back...you get the drift!


And how adorable is this?!?  Doug keeps a log of EVERY time he makes cheese..so he can go back and compare and hone in on the specifics.  I for sure am way too lazy to do that!!!


When the mozzarella got to this point (we were letting it rest...), we took a break and started in on the ricotta...which, was cooked in the MICROWAVE!!!!  Seriously!  And all you need for this is whole milk and vinegar...and a little cheese salt.  SO EASY!!!


Cooking it in the microwave until it reaches about 185 degrees (and when Doug says "about" I think he really means "just"...)   Pretty soon, it starts to look all curdled...like below!  Kind of reminds me of my kids sippy cups after they've sat in the car for three days...  ha ha!


Once it reaches 185 degrees, you add your vinegar.  Stir.  Allow to cool for about 20 minutes.  And then strain out the whey--add cheese and VOILA!  You're done!  See???  Easy!


p.s. this is a picture of the whey... Doug says that it's supposed to be this color--if it's cloudy then something has gone horribly wrong...


Now the mozzarella is mostly done, Doug is just kneading it to remove excess whey and to make it look prettier...more like real cheese...


Do you see the amazing transformation???   When you're done stretching and kneading the cheese (which, let's face it...is only done to impress your students...) wrap it up and refrigerate it!  Or, if you're like me...eat it!   Doug says a gallon of milk makes about a pound of cheese and that it will keep for a couple of weeks in the fridge...but I'm sure it would be eaten long before then.


Our beautiful mozzarella!!!  Although, it looked prettier than this...I think this picture came before he shaped it symmetrically.... 


And the ricotta!!!  My fav of the night--it was really just so good.  

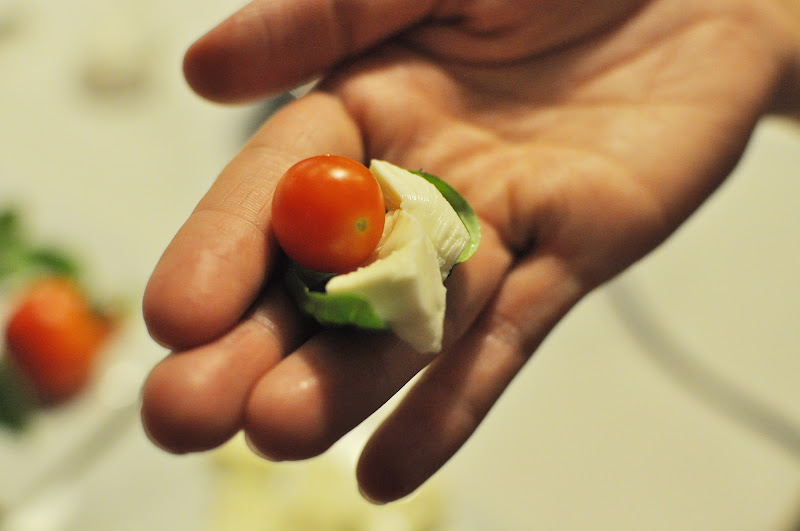
Aren't our tiny caprese's the cutest???  Oh, and check out all these amazing things that I have dreamed up making with my homemade ricotta..... (p.s. click on the picture for the recipe!)


Pasta Salad with Melon, Pancetta, and Ricotta Salata


Ziti with Grilled-Gazpacho Sauce and Sausage


Roasted Pears with Blackberries, Ricotta, and Lavender Sugar


And here are those recipe I've talked so much about!  Give it a try--and I hope you share how it goes!


DOUG’s HOME MADE CHEESES
      By Doug Manifold

RICOTTA in the MICROWAVE

Ingredients and Equipment:
     Whole Milk
     Vinegar, white distilled
     Salt
     Microwave-Safe, 4 or 6 Qrt. Bowl
     Thermometer, 30 to 200-degree F range
     Big Spoons
     Fine Mesh Stainless steel Strainer and Cheese Cloth
     Measuring Spoons and Cups
     Microwave Oven

Process:
I have found the following to be the smallest practical sized batch of cheese to make. To make larger batches simply increase all of the ingredients proportionately.

Pour 4 cups of milk into a microwave-safe bowl

Place bowl in microwave and set for 5 minutes on high

Remove bowl from microwave and check temperature of mix – the target temperature is about 185 degrees F

If the temperature is less than 180 degrees F return it to microwave and cook on high for another 30 seconds

Remove bowl from microwave, if the milk temperature is 185 degrees F, add 4 Tablespoons (Tbls) of vinegar to the milk and stir gently for about one minute

Allow it to set for 10 to 20 minutes to cool and allow the curd to set

Suspend a strainer over a bowl, pot, or other container

Spoon curd into strainer and allow whey to drain – if curd is too weak, line strainer with cheese cloth to help collect curd

After most of the curd is drained, slowly pour the remaining whey through the strainer to recover the remaining cheese curd

Allow the curd to drain for 10 to 25 minutes - depending on how dry you want the cheese to be. If needed, stir the cheese in the strainer/cheese cloth with a spoon to drain faster

Put cheese in a bowl and add ¼ teaspoon of cheese salt, and mix well

Four cups of milk should produce about 6 to 8 oz of lovely fresh ricotta. Increase all ingredients for larger batches (i.e. for 6 cups of milk use 6 Tbls of vinegar and ½ tsp salt). Use the cheese as-is or put the cheese in a container, cover, and refrigerate. Cheese should keep for about a week, more or less, in the refrigerator. This cheese is a wonderful replacement for cream cheese in cheese cake recipes.


DOUG’s HOME MADE CHEESES
     By Doug Manifold

STOVE-TOP/MICROWAVE MOZZARELLA

Ingredients and Equipment:
     1 Gallon Milk (Whole Milk, 2% Fat, or Fat-Free)
     1-1/2 tsp Citric Acid Powder
     1 whole tab Junket Rennet or ¼ tsp Liquid Rennet or ¼ tab Cheesemaking Rennet
     ¼ to ½ tsp Salt
     6 or 8 Qrt Stainless Steel or Non-Reactive Pot (Stainless steel is very important)
     Thermometer, 30 to 200-degree F range (More or less)
     Several Spoons of Different Sizes
     Fine Mesh Stainless Steel Strainer and Cheese Cloth
     Measuring Spoons and Cups
     Microwave Oven

Process:
Mix 1-1/2 tsp citric acid in ¼ cup milky or chlorine-free water, stir well and set aside

Mix rennet in milky or chlorine-free water, stir well and set aside

Pour milk into pot and place on burner. Set burner control to medium or medium-high. Heat milk to 55 degrees F. This may take 5 to 10 minutes. If it takes less than 5 minutes, the stove may be set too high. If more than 10 minutes the stove may be set too low. Adjust the heat as needed.

When milk reaches about 55 degrees F slowly add the citric acid mix and stir thoroughly

Continue to heat the milk and stir gently. At about 6 5degrees F small curd particles should start to form in the mix. Continue to stir gently

When the mix reaches 88 degrees F, add the rennet mix and continue to stir the mix gently for one-minute. This should be about 10 to 15 minutes after the citric acid was added. Adjust the stove temp as needed

Stop stirring, put cover on pot, and let rest until the curd attains a firm yogurt-like consistency. During this time the temp should remain close to 88 degrees F. If the temp drops below 88 degrees F in a few minutes, turn the heat back on for a few minutes to help return to the 88 degree F point. If the temp of the mix exceeds 90 degrees F, remove the pot from the burner and very gently place it on a wooden cutting board to cool to 88 degrees F.

Once the curd attains a firm set (about 5 minutes for liquid rennet or solid rennet tabs or about 30 minutes for Junket Rennet), using a long, thin blade, like a cake knife, cut the curd into roughly one-inch cubes, stir very gently, and let it rest for a couple of minutes

After this rest period, the whey should be draining well from the curds and there should be a good separation between the curds and whey. Return the pot to the burner and continue to heat to 105 degrees F in about ten minutes. Once the mix reaches 105 degrees F, remove the pot from the heat and allow it to rest for 20 minutes.

Place the strainer over a pot, large bowl, or other container and begin to transfer the curd to the strainer with a large, slotted spoon. Gently press the curd into the strainer to help drain excess whey. If the strainer becomes too full, transfer the cheese to a microwave-safe bowl, put the strainer back over the container and continue to drain the rest of the cheese and place it in the collecting bowl.

Finally, pour the remaining whey through the strainer to recover as much cheese curd as possible

Place the bowl in the microwave and set to one minute on high

Remove the bowl from the microwave, check the temperature, and knead the cheese with a spoon to remove excess whey. Pour off the whey. The target temp is 145 degrees F.

Place the bowl back in the microwave and set to 30-seconds on high

Remove the bowl from the microwave, check the temperature, and knead the cheese with a spoon to remove excess whey. Pour off the whey

Place the bowl back in the microwave and set to 30-seconds on high

Remove the bowl from the microwave and knead the cheese with a spoon to remove excess whey.

Pour off the whey. Check the temperature of cheese curd – the target is 145 degree F

If the temperature is at or above 145 degrees F knead with a spoon to produce a smooth, shiny surface then add ¼ to ½ tsp of salt (salt to your taste preference) and knead the cheese with a spoon to blend the salt and begin to stretch the cheese until the surface becomes shiny and the cheese cools to the point that it no longer stretches easily. If you want to stretch the cheese for a longer time, place it back in the microwave safe bowl and microwave for 30 seconds to soften it and to heat it back up to 140 degrees F

Once you finish stretching and kneading the cheese place it in a bowl of cold water and ice to cool it quickly then put the cheese in an air tight container, cove the container, and place it in the refrigerator.

Use the cheese as needed.

A gallon of milk should make about a pound of cheese. The cheese should keep in the refrigerator for a couple of weeks, more or less.